Category Archives: equipment

Cut and Dried

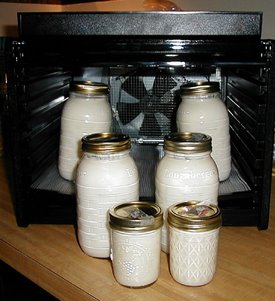
I bought a dehydrator simply to make yogurt. Sure, I told myself at the time, I could dry berries and cherries and make healthy chips out of root vegetables. But the main driver was that I needed a reliable incubator for my yogurt and that was all. Sure, I’ve tried a few vegetable experiments, previously mentioned, and not worth mentioning further. So here’s the thing–my friend Sr. Catherine Grace is a dehydrating overachiever.

I bartered an Excalibur dehydrator for many lovingly cultivated vegetable seedlings and seeds. Instead of going to a retail nursery, I went to the Sisters where they know their plants and their plants know them. These seeds and seedlings are decendents of plants right from Bluestone Farm. There’s something very special about knowing who your plants’ parents and grandparents were. Anyway, back to Sr. Catherine Grace’s adventures with the dehydrator…

On Day 1:

The dehydrator arrived yesterday afternoon, and of course I whipped it into service. What a fabulous piece of equipment, and it’s going to get a huge amount of duty around here! So far I’ve finished drying some Borghese, cherry and Sun Gold tomatoes and the first Boldog peppers of the year!

It holds as much as both of the old dryers we were using, and best of all, I can set the timer and the temperature!!! No more guessing! The drying is even, the shelves are exactly the most useful distance from each other (no more tomatoes stuck almost permanently to the shelf above the one they started on), the screens are smaller so I can dry small stuff safely, and the three different surfaces are really, really useful. I can even tuck full dill heads into the basic shelf so the seeds dry more quickly, and they don’t get blown away by the fan!!

The square shelves make soooo much more sense; more food in less space, and so much easier to lay out.

The Excalibur people might want to consider using her in their next advertisement.
On Day 2:

Here is just one hour’s worth of work (if you can call slicing “work”), to load up the dehydrator! With room to spare, this is five large tomatoes, a load of Sun Gold and Borghese tomatoes (small ones), two huge pattypan squash, two yellow squash, three and a half green zucchini-like squash (one huge), and one long light green squash. Probably would have taken me about six hours to process all this into something I could freeze.

Are you Excalibur people getting all this?

On Day 3:

Today it’s more tomatoes and a lot of apple rings with cinnamon. I’ve decided to dry tomato slices rather than can or freeze them; no electricity to run them in the freezer all season, they maintain much more of their healthful goodies when dried rather than cooked, canned, and/or frozen, and this is much less dangerous than canning. (I’m really, really, really careful when canning low-acid food, but still …)

At the moment I’m finding everything is taking longer than even some of the long-end-of-the-range that’s in the book; probably because it’s still pretty humid. With the timer, though, who cares?!

I think dryers are a fabulous boon to the food preserving process. I especially like this one; it’s easy to use, really easy to clean, things dry evenly, and you can leave a shelf out if you’re drying something chubby or fluffy — or making yogurt. By the way, the yogurt leather (yogurt with strawberry jam) and the applesauce leather came out beautifully.

I really can’t thank you enough for this. I think the rest of the sisters believe I plan to be dried in there myself when my Great Transformation arrives.

Okay Excalibur, you could not get a better endorsement than that!

And I think I need to get slicing and drying…

Puttin’ By

When I started this local eating thing, I had no intention of puttin’ food by (storing it either by canning, freezing, drying, or some other method). I was to be a grasshopper, patron of the ants of the world. It turns out that there are not enough ants to feed locavore grasshoppers. While we made it through the winter, we did so with lots non-local veggies. You can get meat and dairy products all winter long, but fruits and veggies are hard to come by. No offense to Two Guys from Woodbridge, but hydroponic salad greens start to get to you. And you want something you can eat hot.

So, the plan this year is to freeze and dehydrate as we go. We may even explore canning.

This weekend, we cooked and froze:
– two bunches of beets
– beet greens from said bunches (sauteed with garlic and olive oil–pretty much how I cook most greens)
– corn off the cob (two ears)
– summer squash melee (from Simply Recipes, but without the cheese).
– roasted peppers
– kale (sauteed with olive oil and pancetta)
– a head of broccoli (blanched)

We store it in freezer bags using the FoodSaver home vacuum-packaging system. It sucks out the air and seals the bag. Nice (except when the food has a significant amount of liquid).

Looking back over the list, it doesn’t seem like as much now as it did while we were preparing it.

Raw Milk Yogurt

My biggest barrier to making my own raw milk yogurt was in finding a reliable low-heat source. My electric oven does not have a pilot and the light bulb lights intermittently. With the arrival of my Excalibur Dehydrator, I am ready to go!

I do like the organic local Hawthorne Valley yogurt as well as the organic regional brands from Seven Stars Farm (Phoenixville, PA) and Stonyfield Farm (Londonderry, NH). The problem for me is that these are all made from pasteurized milk because that is the law. Apparently, the few states that allow raw milk sales do not allow for the production and sale of raw milk yogurt. It seems to me that the food laws that are designed to protect us are the strangest of all.

So, I researched several recipes and it comes down to
– how much to heat the milk
– how much starter yogurt to add (for the live cultures)
– the incubation temperature
– the incubation time

The most popular milk-heating temperature is 110°. I did see one recipe that called for heating the milk to 180° and then letting it cool to 110°, but it seems it would defeat the purpose of using raw milk. I thought that the enzymes and beneficial bacteria are killed at 130°.

The recommended amount of starter yogurt to add varies from 1/8 of a cup to 1/4 (if you’re using commercial, which by default means pasteurized, yogurt). Most say to use about twice as much if you’re using your own previous batch of raw milk yogurt.

The suggested incubation temperature ranges from 90° to 110° and an often-suggested period is eight hours.

I got another recipe that called for heating the milk to 90°, adding 1/2 of a cup of (commercial) starter and incubating it at 90° to 100° for 18-36 hours. I have had this yogurt and it is exceptional, but this being my first time, I wanted something that would be ready sooner!

I went for heating the milk to 110°, and incubating it in the dehydrator at 105° for 8 hours. I did make two jars using 1/2 cup each of starter and two other jars using 1/4 cup each of starter.

My yogurt came out similar in consistency to the Hawthorne Valley, perhaps slightly “looser.” There was no noticeable difference between the ones with 1/4 cup of starter vs. those with 1/2. It tastes amazingly like yogurt!

UPDATE: I found a better way to make the yogurt to get the consistency I want in July 2008.